Scratch-building for beginners - page 8
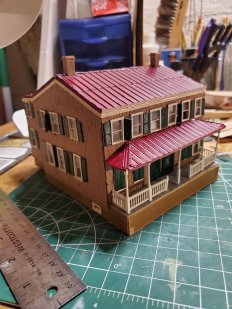
Okay campers, buckle up - it's going to be a really bumpy ride; we're going to build the front porch!!
Begin by finishing the brickwork for the porch - cut a piece of brick sheet 16 bricks tall and as long as the distance between the outside of the sides. Apply mortar and glue the piece in place with plastic cement. Reinforce the corners with short pieces of wood, making sure to leave a 5/64" space between the top of the wood and the top of the walls to accomodate the lower portion of the porch floor (next step).
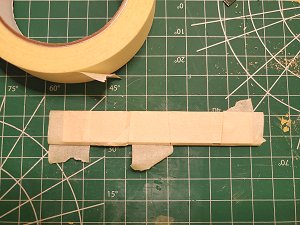
Next, cut a piece of 5/64" basswood to fit inside the brick walls (mine worked out to be 3/4" x 4-7/16"), and cut a piece of 1/32" basswood long enough and wide enough to cover the 5/64" piece plus the thickness of the brick walls on the front and sides . Glue these pieces together in a sandwich to create the base for the 1" x 4" floorboards.
NOTE: make one long edge of the 1/32" sheet flush with one long edge of the 5/64" sheet; this edge will butt against the front wall of the house. Wrap several pieces of masking tape around the sandwich, pulling tightly to clamp the pieces together. Allow 10 minutes for the glue to dry, then remove the tape.
|
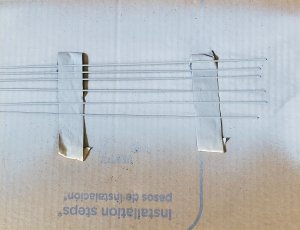
You should paint the 1" x 4" floorboards before applying them to the porch floor. Do this by sticking them to loops of masking tape turned inside out (with the adhesive facing out). Spray the boards lightly with three coats of paint by covering them with a single pass of the spray can for each coatt, sanding lightly with 220-grit sandpaper between coats to remove fuzz. SAND GENTLY; if you sand too aggressively you will sand through the wood!
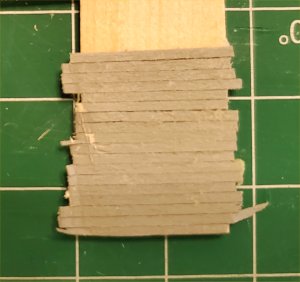
Apply a thin coat of Elmer's glue to a small section of the porch base - no larger than 1/4" wide at a time to prevent the glue from drying out while working - and apply the 1" x 4" floorboards, leaving a small piece extending past the edges of the 1/32" base. When all the floorboards have been laid, turn the assembly over so the floorboards are face down and use a single-edge razor blade to trim the edges where the excess floorboards are overhanging the front and back.
|
|
Once the floorboards have been glued into place and trimmed, the porch floor assembly should snap into the space between the brick walls. Apply a small amount of super glue on top of the brick walls to secure the floor assembly.
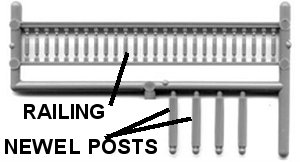
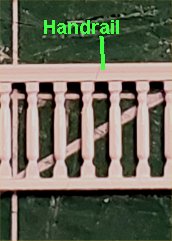
Next are the railings. You will need four (4) porch columns, two (2) newel posts, and six (6) 19mm-long sections of railing. NOTE that the porch railing has a handrail section; be sure to keep this section facing UP - it looks really strange if the railings are installed upside down. Assemle the porch railing systems before you paint them; the super glue makes the paint peel off pre-painted components (I know this from yet another learning experience I had while building this model).
|
Also note that the porch elevation drawing is incorrect - while there was a center column, the elements to the immediate left and right of it were newel posts, not full columns.
|
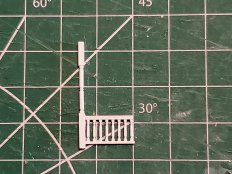
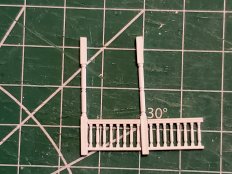
Begin construction of the porch railings by applying a dab of super glue to the bottom portion (the longer square section) of one of the columns at each of the two points where the railing will meet it. Lay the column on its side so that the side with the glue is facing right. Now slide a 19mm-long section of railing up against the glued area and gently press the pieces together. Allow about 30 seconds for the glue to set up enough to allow handling of the assembly.
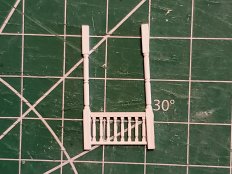
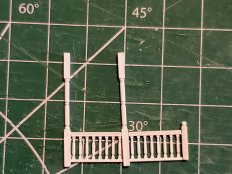
Next, apply glue, as before, to two opposite sides of a second column and slide one glued side against the first section of railing. BE CAREFUL during this and subsequent steps because it's really easy to get super glue on your fingers - which means the pieces will stick to you instead of to each other.
|
|
|
|
|
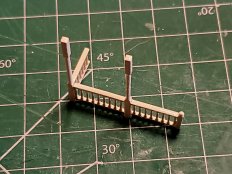
After sliding the second column into place against the first section of railing, slide a second 19-mm long section of railing against the second side of the second column. Next, apply super glue to one side of one of the newel posts and slide the newel post against the second section of railing.
Now set the assembly up on the column bases and apply super glue to the back of the first column. Finally, hold a third 19-mm long section of railing against the back of the first column to form a corner. Hold the assembly uporight until the glue sets, approximately 30 seconds.
Repeat these steps to create a second, mirror-image column-and-railing assembly for the opposite side of the porch.
Apply the super glue SPARINGLY; the porch columns and railings are delicate and you will ruin them
if you use too much super glue. Use the tip of a toothpick to pick up and apply a pin-head size drop of glue at each
point of contact between the railings and the columns.
|
|
Next is the porch roof.
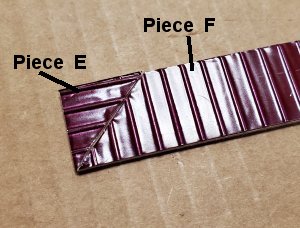
The porch roof comprises pieces E, F, and G. When properly oriented, the pieces create a rectangle:

As shown in the picture, edges A-A match up, as do edges B-B. Sand a slight angle onto each labeled side so that the pieces line up flush with no gaps. The angle is approximately 78 degrees. If you can't get a perfect match, try to get the sides so that you can at least glue them together; when the roof is assembled correctly, the sides and front will rest on a flat surface without wobbling.
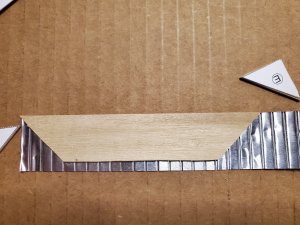
Next, get a strip of roofing material that has been painted red and lay it face down on your cutting mat. Spread super glue on the top of roof section F, then lay it face down on top of the roofing material. Press down firmly and let the glue set...approximately 30 seconds. Once the glue has set, trim away the extra roofing material.
|
|
To apply roofing material to pieces E and G, lay the remnant of the roofing material used to surface piece F face down and apply glue to either piece E or piece G, then turn the piece so that the ribs in the roofing material are running parallel to edge P; this will ensure that the ribs meet at the hips of the roof where section F meets sections E and G.
Once all three sections of the porch roof have had roofing material applied, glue the pieces together. Apply ridge caps to the hip joints (see page 6 for details on how to make ridge caps).
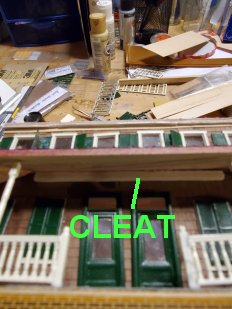
Next you need to apply a cleat to the front of the house to support the top edge of the roof; I used a 3"x1/2" piece of 5/64" material. Place the roof against the front of the house so that the top edge of the roof is just below the upper windows. Trace a line on the front of the house underneath the roof; this will be the location for the top of the cleat.
Glue the cleat in place against the front of the house with super glue using the traced line as a guide
The next step is to glue the railings in place on the porch deck. Place one of the railing assemblies so that the front corner is just inside the edges of the deck and place dots of super glue where the posts touch the deck, then set the railing assembly in place. Repeat for the second railing assembly.
Now test-fit the porch roof on the cleat and see if the porch columns need to be trimmed at the top (they should). Trim the columns so the sides of the roof sit flush against the front of the house. Glue the roof in place with super glue applied along the edges of the roof that will abut the front wall of the house.
 |
| Previous | Next |
